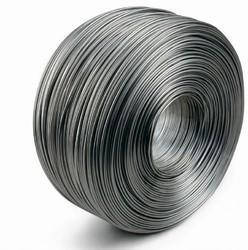
Розміри та допуски на розміри стрічки нержавіючої
Розміри та допуски на розміри стрічки нержавіючої
Tolerances to BS EN 10258 for cold rolled narrow stainless steel strip
General
EN 10258 only applies to:
- Cold rolled narrow strip which is defined as having a rolled width of < 600 mm
- Coils slit from such narrow strip
- Cut lengths obtained from cold rolled narrow strip
- Maximum thickness of 3.00 mm
A range of special tolerances are provided for on thickness, width, length, flatness and edge camber.
Thickness tolerance
Tolerances are defined as Normal, Fine (F) or Precision (P). If the tolerance type is not specifically mentioned at the time of enquiry order or the Normal tolerance shall apply.
| Tolerances on nominal thickness1) | ||||||||||
| Nominal Width (w) | w < 125 | 125 < w < 250 | 250 < w < 600 | |||||||
| Nominal Thickness (t) | Normal | Fine (F) | Precision(P) | Normal | Fine (F) | Precision(P) | Normal | Fine (F) | Precision(P) | |
| Equal to and over | Less than | |||||||||
| 0.052) | 0.10 | ±0.10 t | ±0.06 t | ±0.04 t | ±0.12 t | ±0.10 t | ±0.08 t | ±0.15 t | ±0.10 t | ±0.08 t |
| 0.10 | 0.15 | ± 0.010 | ±0.008 | ±0.006 | ±0.015 | ±0.012 | ±0.008 | ±0.020 | ±0.015 | ±0.010 |
| 0.15 | 0.20 | ±0.015 | ±0.010 | ±0.008 | ±0.020 | ±0.012 | ±0.010 | ±0.025 | ±0.015 | ±0.012 |
| 0.20 | 0.25 | ±0.015 | ±0.012 | ±0.008 | ±0.020 | ±0.015 | ±0.010 | ±0.025 | ±0.020 | ±0.012 |
| 0.25 | 0.30 | ±0.017 | ±0.012 | ±0.009 | ±0.025 | ±0.015 | ±0.012 | ±0.030 | ±0.020 | ±0.015 |
| 0.30 | 0.40 | ±0.020 | ±0.015 | ±0.010 | ±0.025 | ±0.020 | ±0.012 | ±0.030 | ±0.025 | ±0.015 |
| 0.40 | 0.50 | ±0.025 | ±0.020 | ±0.012 | ±0.030 | ±0.020 | ±0.015 | ±0.035 | ±0.025 | ±0.018 |
| 0.50 | 0.60 | ±0.030 | ±0.020 | ±0.014 | ±0.030 | ±0.025 | ±0.015 | ±0.040 | ±0.030 | ±0.020 |
| 0.60 | 0.80 | ±0.030 | ±0.025 | ±0.015 | ±0.035 | ±0.030 | ±0.018 | ±0.040 | ±0.035 | ±0.025 |
| 0.80 | 1.00 | ±0.030 | ±0.025 | ±0.018 | ±0.040 | ±0.030 | ±0.020 | ±0.050 | ±0.035 | ±0.025 |
| 1.00 | 1.20 | ±0.035 | ±0.030 | ±0.020 | ±0.045 | ±0.035 | ±0.025 | ±0.050 | ±0.040 | ±0.030 |
| 1.20 | 1.50 | ±0.040 | ±0.030 | ±0.020 | ±0.050 | ±0.035 | ±0.025 | ±0.060 | ±0.045 | ±0.030 |
| 1.50 | 2.00 | ±0.050 | ±0.035 | ±0.025 | ±0.060 | ±0.040 | ±0.030 | ±0.070 | ±0.050 | ±0.035 |
| 2.00 | 2.50 | ±0.050 | ±0.035 | ±0.025 | ±0.070 | ±0.045 | ±0.030 | ±0.080 | ±0.060 | ±0.040 |
| 2.50 | 3.003) | ±0.060 | ±0.045 | ±0.030 | ±0.070 | ±0.050 | ±0.035 | ±0.090 | ±0.070 | ±0.045 |
- By agreement, the tolerances may be alternatively totally '+' or totally '-' or unevenly distributed around the nominal thickness. In any case, the total tolerance shall be as in the above table.
- For thicknesses below 0.05 mm, the values for the tolerances are to be agreed at the time of the enquiry and order
- Including 3.00 mm
Width Tolerance
| Tolerances on nominal width | |||||||||||||
| Nominal Thickness (t) | Nominal Width (w) | ||||||||||||
| Equal to and over | Less than | w < 40 | 40 < w < 125 | 125 < w < 250 | 250 < w < 600 | ||||||||
| Normal | Fine (F) | Precision (P) | Normal | Fine (F) | Precision (P) | Normal | Fine (F) | Precision (P) | Normal | Fine (F) | Precision (P) | ||
| --- | 0.25 | +0.17/ -0 | +0.17/ -0 | +0.10/ -0 | +0.20/ -0 | +0.15/ -0 | +0.12/ -0 | +0.25/ -0 | +0.20/ -0 | +0.15/ -0 | +0.50/ -0 | +0.50/ -0 | +0.40/ -0 |
| 0.25 | 0.50 | +0.20/ -0 | +0.15/ -0 | +0.12/ -0 | +0.25/ -0 | +0.20/ -0 | +0.15/ -0 | +0.30/ -0 | +0.22/ -0 | +0.17/ -0 | +0.60/ -0 | +0.50/ 0 | +0.40/ -0 |
| 0.50 | 1.00 | +0.25/ -0 | +0.20/ -0 | +0.15/ -0 | +0.25/ -0 | +0.22/ -0 | +0.17/ -0 | +0.40/ -0 | +0.25/ -0 | +0.20/ -0 | +0.70/ -0 | +0.60/ -0 | +0.50/ -0 |
| 1.00 | 1.50 | +0.25/ -0 | +0.22/ -0 | +0.15/ -0 | +0.30/ -0 | +0.25/ -0 | +0.17/ -0 | +0.50/ -0 | +0.30/ -0 | +0.22/ -0 | +1.0/ -0 | +0.70/ -0 | +0.60/ -0 |
| 1.50 | 2.50 | --- | --- | --- | +0.40/ -0 | +0.25/ -0 | +0.20/ -0 | +0.60/ -0 | +0.40/ -0 | +0.25/ -0 | +1.0/-0 | +0.80/ -0 | +0.60/ -0 |
| 2.50 | 3.00 | --- | --- | --- | +0.50/ -0 | +0.3/ -0 | +0.25/ -0 | +0.6/ -0 | +0.40/ -0 | +0.25/ -0 | +1.2/ -0 | +1.0/ -0 | +0.80/ -0 |
- By agreement, the tolerances may be alternatively totally '+' or totally '-' or unevenly distributed around the nominal thickness. In any case, the total tolerance shall be as in the above table.
- Including 3.00 mm
Tolerances on length
| Tolerances on nominal length | ||
| Nominal Length (L) | Tolerances | |
| Normal | Special (S) | |
| L < 2000 | +3.00/-0 | +1.50/-0 |
| 2000 < L < 4000 | +5.00/-0 | +2.00/-0 |
Flatness tolerance
The flatness of tolerance cut lengths shall not exceed 10mm for normal cases and 7mm where a special tolerance (FS) is required. This requirement does not apply to material supplied in the work hardened condition.
Edge waviness tolerance
For skin passed or stretch levelled the strip waviness of the edges shall be 0.03 for nominal thicknesses up to and including 1.00 mm and 0.02 for nominal thicknesses over 1.00, where waviness is defined as:
h/L where h is the wave height and L is the length over which the height is measured.
Out of squareness
The out of squareness of cut lengths in widths of 250mm and above shall not exceed 0.5% of the actual width of the product.
For cut lengths in widths of less than 250mm, the value is agreed to be at the time of enquiry and order.
Out of squareness is measured as in the diagram below:

Tolerance on edge camber
These shall be as in the table below:
| Tolerances on edge camber | |||||
| Specified width | Edge camber tolerances | ||||
| Equal to and over | Less than | Normal | Restricted (R) | ||
| Measuring length | Measuring length | ||||
| 1000 | 2000 | 1000 | 2000 | ||
| 10 | 25 | 4 | 16 | 1.5 | 6 |
| 25 | 40 | 3 | 12 | 1.25 | 5 |
| 40 | 125 | 2 | 8 | 1.0 | 4 |
| 125 | 600 | 1.5 | 6 | 0.75 | 3 |
Edge camber is the greatest deviation of a side edge from a straight line, the measurement being taken on the concave side with a straight edge as shown in the diagram below:


